Thursday, 27 October 2011

Full and Free Internet Download Manager 6 Build 8 - Patch+Serial

Internet Download Manager is a tool to accelerate download speed and to fetch maximum speed out of your internet connected, Many people around the globe use internet download manager as it is reliable as well as quite fast with a good interface to control downloads efficiently. I have already posted previous versions of IDM which have crack included. So, that can be used for free. Now, here is a new version of IDM which is far more better than that. I’ll tell you way that how can we use that for free. First lets, discuss that how it is better? then other download managers which are built in inside your browser.


Features Of Internet Download Manager:-


  1. According to official release notes, IDM increases download speed 500 times, and If you want to buy it then it worth's:- 24 USD
  2. Comprehensive error recovery and resume capability will restart broken or interrupted downloads due to lost connections, network problems, computer shutdowns, or unexpected power outages. Simple graphic user interface makes IDM user friendly and easy to use.

    Internet Download Manager has a smart download logic accelerator that features intelligent dynamic file segmentation and safe multipart downloading technology to accelerate your downloads and then after download converge all parts together.
  3. In newer version, every separate download window has new tabs installed, where you can control the speed of every download, You can limit speed of any download as you want.
  4. It can easily download videos from YouTube and other websites which offer streaming videos.
  5. It can integrate with Mozilla Firefox, Chrome, Opera, Internet Explorer and many other popular browsers and can take downloads automatically.
Download Internet Download Manager | Patch and Serial Included:-


You can download it for free from here. How to use Serial and Patch please read below Guide!


How to Use Internet Download Manager For free i-e Patching Process:-


  • Download the above given package.
  • Extract that Using WinRAR and open the extracted Folder.
  • Now, Run Setup (Installer MaherHackers.com). When setup finishes don’t click finish, at the last step of the setup. (Basic theme is this that IDM must not be running behind in background as it can fail the hack)
  • Again open the extracted package and open, Patch (Online Checker Killer+Serial Generator) and then hit Patch Server Check. It will patch automatically (This option won’t allow the IDM to check online that whether IDM is really purchased or its fakely registered, so, we’ll kill it) If it doesn’t patch and Browse windows opens, then go where IDM has been installed and open up IDMan.exe, Normally its located in C:\Program Files\Internet Download Manager/IDMan.exe, as it depends where you have installed it. Then patching will be done.
IDM
  • Now, as the setup of IDM is pending at the last step, open the pending setup and hit finish and let IDM Run. Open up the IDM and go to Registration Tab and enter and name, email address and in the end put the serial number which is given in Patch (Online Checker Killer+Serial Generator, as you can see in above screen shot.
  • You are done, Enjoy using it and never update this IDM otherwise all hard work will go to hell. Smile with tongue out

Hack BSNL 3G For Free GPRS - Unlimited Internet


After BSNL India launched 3G for mobile phone , there were , many loopholes found in the system that were exploited by hackers to access free internet on their mobile phones. With this trick you can get Free Unlimited internet surfing on your 3G enabled mobile phone with BSNL 3G connection. I have tried this method on my Nokia 5800 Xpress Music phone. 


Steps to connect BSNL 3G Free GPRS Trick:

  1. First of all you have to select GSM mode on your mobile.
  2. Go to settings then network settings and then select network mode GSM.
  3. After that go to your web browser and open any webpage , say m.google.com .
  4. After opening any website goto network settings and choose UMTS mode.
Thats it. Your 3G net is free now.  This trick works for high end symbian phones like 5320, 5800, n95 etc and E series full support.
Note:

When you enters from GSM to UMTS 1 paisa or 2 paise will be deducted from your account.

Free Facebook Themes For Download


Are you bored using Same Facebook Skins and Layouts in yours profiles want to change this dont worry it will be easy and take yours few mintutes to change yours Facebook themes.


Just follow the guideline below and you will change your facebook theme in minutes and making your Facebook experience alot better than before


Requirements

There are two basic requirements before you can use the themes.


Free Facebook Themes

If you already meet all the requirements, then let the themes begin!


Spring  Facebook Theme


Facebook themes


Download this theme from here. 


Summer Spring Facebook Themes


Facebook themes


Download this theme from here.


Free Facebook Black theme:


Facebook themes


Download this from here. 


Free Facebook Pink theme:


Download this theme from here

Find Serials For Anything In Google

Crack or find any serial for what you want(softwares,games etc).. This is the easiest way to find serials for all software or any other thing(anything), crack any serial for any software,games and many more...


Let us see how?

There is simple code for it you can easily remember '94FBR'(code)

If you want to find the serial for Windows XP Professional just type in google search...
"Windows XP Professional" 94FBR followed by enter key.

If you want to find the serial for MS OFFICE 2007 just type in google search...
"MS OFFICE 2007"94FBR followed by enter key.

Find any mp3 file which u want to hear or download .....
There is an another trick for finding mp3 files on web...

Let us see how?

There is simple code for it you can easily remember 

If u want to find songs of om shanti om or any particular in this movie just type in google search or any search which u like

"index of/" "om shanti om" .mp3 

OPEN BLOCKED WEBSITE


Do you want to access sites which are blocked? then just follow thes steps and enjoy surfing..


Here are steps:
1). Open Google.com.
2). Type transparent free Proxy address free.
3). In search result, Click on any of the link for free fresh transparent proxy list.
4). Now here look for a proxy address with port 8080.

5). Now go to tools menu of your browser.
6). Go to Internet options and click on use a proxy server for LAN options.
7). Type number that you found in the website with 8080 port.
8). Click Ok.
9). Now open any website.
Enjoy Surfing!!!

Increase Your Internet Speed By 20%


Microsoft reserves 20% of your available bandwidth for their own purposes like Windows Updates and interrogating your PC etc


You can get it back :


Click Start then Run and type “gpedit.msc
” without quotes. This opens the group policy editor.
Then go to:


–> Local Computer Policy

–> Computer Configuration

–> Administrative Templates

–> Network

–> QOS Packet Scheduler

–> Limit Reservable Bandwidth.

Double click on Limit Reservable bandwidth.


It will say it is not configured, but the truth is under the ‘Explain’ tab i.e.” By default, the Packet Scheduler limits the system to 20 percent of the bandwidth of a connection, but you can use this setting to override the default.”


So the trick is to ENABLE Reservable bandwidth, then set it to ZERO. This will allow the system to reserve nothing, rather than the default 20%.

It works on Win XP, Win 7 and as well as Win 2000.

Wednesday, 26 October 2011

Make Your Windows PC Looks Like Mac

Mac In Windows


Everybody Knows About Mac OS. And Also Want To Use It. So Here Is A Tutorial How To Make Your Windows Xp/7/Vista Look Like Mac Without Any Risk.
It Not Change Full Operating System To Mac, This Is Only Theme And Some Effects That Very Similar To Mac. So Don't Hesitate To Try It. You Can Get Back To Windows Anytime.


Now Follow The All Steps Carefully And See What Happen !

 
Step 1. Download This File - All Files That We Need Are In The File.


Download Now  15.02 MB


=> Now Extract The Files To Anywhere In Your Pc. <=


Step 2 : Open Rocketdock Folder And Install RocketDock-v1.3.5.exe.


After Install Rocketdock Do The Following : 
  1. Copy The Folder Stardocklet To C:\Program Files\RocketDock\Docklets
  2. Copy The Folder Nabs osx leopard To C:\Program Files\RocketDock\Skins
  3. After Copy It To Skin Folder, Open Nabs osx leopard Folder And Copy indicator.png To C:\Program Files\RocketDock\Defaults\DefaultIndicator
Step 3 : Open Replacer.zip From Apps Folder And Extract It To Desktop (Or Anywhere Else). - Little Difficult Part For Newbies !

  • Now Open Replacer.cmd And Go To C:\Windows\system32 And Find uxtheme.dll
  • Drag The uxtheme.dll File From C:\Windows\system32 To Replacer.cmd And Press Enter.
  • Now immediately Go To Apps Folder ( In Extracted Files) And Find uxtheme.dll
  • Drag This uxtheme.dll To Replacer.cmd Again And Press Enter.
  • When Replacer.cmd Ask Y Or N Press Y And Press Enter. It's Done.
Now The Difficult Part Is Over.


Step 4 : Theme Installation - Its Very Easy !

  • Now Open Mac Theme For Windows Folder From Extracted Files.
  • Copy Leopard X.theme And X Folder To C:\WINDOWS\Resources\Themes.
  • Double Click On Leopard X.theme And Click Apply And Then Ok.
Now Your PC Is Changing To Mac But We Need Some Customization To Get It Completely Look Like Mac.


=> Now Go To Desktop And Right Click On Any Empty Space And Go To Arrange Icons By And Uncheck Show Desktop Icons.

If You Not Understand It Click Here To See Image : Uncheck Show Desktop Icons Image


=> Right Click on Taskbar and untick Lock Taskbar and Pull Taskbar to Top of the Screen and Again Right Click on Taskbar and tick Lock Taskbar.

If You Not Understand It Click Here To See Image : Change Taskbar Position Image


=> Now Open Rocketdock, Right Click On It And Set Screen Position To Bottom.

=> Now Right Click On Rocketdock Again And Click On Add Item And Select Stack Doclet And Open It And Change Settings As You Like.


If You Not Understand It Click Here To See Image : Add Item Rocketdock Image


Now You Can Add More Effects By Installing Apps That Provide With Downloaded File In Folder Called 'Apps'

5 Ways To Increase Windows Boot Up Speed

Make Windows Boot Faster


We All Facing Problem Of Windows Boot Up Speed. Sometimes It Take Too Long To Get PC To Load.
Therefore Here I Mention All Tweaks That Increase Windows Boot Up Speed In Easy Tips And Tricks.
This All Tricks Are Risk Free ! So You Can Try It Out Without Any Hesitation. 


1. Decrease Startup Delay :


In This Step First Go To Start And Open Run
In Run Type msconfig And Press Enter.You Will Be See The New Window Popups.
Now In This Go To BOOT.INI Tab. You Will See Timeout Option In It.
Change Timeout To 5 sec From 30. And Save Settings.


2. Defragment Your Hard Drive :


Go TO Start -> Accessories -> System Tools And Choose Disk Defragment.
Then Analyse The Disks And After Analyzing Is Over Click On Defrag.


3.Remove Unwanted Startup Programs :


Open your Start menu.

Click Run
Type msconfig, click Enter
In the system configuration utility,click either services or startup tab.
Uncheck all programs that your are no longer want to run in the background.
It' Done...


4.Detele Temporary Files From Your PC :


Temporary Files Is Story Your Much Memory And Also Get More Processes.
So We Need To Delete It Regularly.


To Delete Temporary Files From Your PC,


Go To Start And Open Run.
In The Run Menu Type %temp% And Press Enter.
Now The Folder Of Temporary Files Will Be Open.
Select All Files And Delete Them.


5. Scan Disk For Fix Issues :


Go To My Computer And Right Click On C: Drive.

And Select Properties.

A Popup Menu Will Be Open.

In This Menu Navigate To Tools Tab.

You Can Find Error-Checking Option Under It.

Click On Check Now And Fix Essues.


It's All Done.


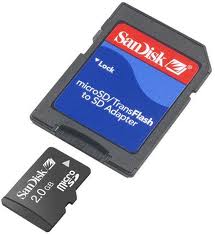
Recover Lost Password Of Memory Card(MMC,Micro SD)


How to recover lost password of Memory Card (MMC, micro SD) adapterSome times it happens that you forgot the password of your memory card (MMC, micro SD) and you have lots of your important data in it. and You struggle to get back your password. Right? Today am going to show you how you can recover the lost password of your memory card with the help of nokia phone.
It is possible only if you have Nokia’s s60 phone (eg: 6600, 6610, N70,N73,E63,E71,N95)

The thing you got to do is download and install “Fileexplorer” software.
.


After installing follow the steps:


1. Open FExplorer and access the c: drive.

2. There u will find a file named ‘mmcstore’

3. Rename the file to: ‘mmcstore.txt’

4. The file will now open in notepad

5. U will get your password written in the notepad file

Note #1: I think only few s60 phones have microSD slots. so you got to get a MMC adapter (costs around Rs.50). fit your microSD card in it and insert the MMC in your phone.
Note #2: If you Just want to format your card (without recovery of data), then just get a microSD card reader and format it.

What Else you can do with FExplorer??

How to reset the operator logo :

1) go to the following dir :
c:\system\apps\phone\oplogo
2) delete any file in this directory
3) restart the phone

To make a screenshot on a Nokia 3650, 6600 :

1) use the pencil key + ’0′

2) the screenshot is saved in C:\NOKIA\IMAGES\FE_img\

To make a screenshot on a SX1 :

1) use the shift key + ’0′

2) the screenshot is saved in C:\NOKIA\IMAGES\FE_img\

Remember, there are some shortcuts :

<KeyPad 1> : copy

<KeyPad 2> : show path (scroll with joystick left/right)

<KeyPad 3> : PageUp

<KeyPad 4> : cut

<KeyPad 5> : *not yet used*

<KeyPad 6> : top of the list

<KeyPad 7> : paste

<KeyPad 8> : *not yet used*

<KeyPad 9> : PageDown

<KeyPad 0> : Mark / Unmark a file

<KeyPad *> : go to root

<KeyPad #> : file properties

<KeyPad C> : delete a file

NOKIA UNIVERSAL CODES


NOKIA

Nokia Universal Codes

Code Description :

These Nokia codes will work on most Nokia Mobile Phones


(1) *3370# Activate Enhanced Full Rate Codec (EFR) - Your phone uses the best sound quality but talk time is reduced my approx. 5%


(2) #3370# Deactivate Enhanced Full Rate Codec (EFR) OR *3370#


(3) *#4720# Activate Half Rate Codec - Your phone uses a lower quality sound but you should gain approx 30% more Talk Time.


(4) *#4720# Deactivate Half Rate Codec.


(5) *#0000# Displays your phones software version, 1st Line : Software Version, 2nd Line : Software Release


Date, 3rd Line : Compression Type.


(6) *#9999# Phones software version if *#0000# does not work.


(7) *#06# For checking the International Mobile Equipment Identity (IMEI Number).


(#pw+1234567890+1# Provider Lock Status. (use the "*" button to obtain the "p,w"and "+" symbols).


(9) #pw+1234567890+2# Network Lock Status. (use the "*" button to obtain the "p,w"and "+" symbols).


(10) #pw+1234567890+3# Country Lock Status. (use the "*" button to obtain the "p,w"and "+" symbols).


(11) #pw+1234567890+4# SIM Card Lock Status. (use the "*" button to obtain the "p,w" Go to Topand "+" symbols).


(12) *#147# (vodafone) this lets you know who called you last.


(13) *#1471# Last call (Only vodofone).


(14) *#21# Allows you to check the number that "All Calls" are diverted to


(15) *#2640# Displays security code in use.


(16) *#30# Lets you see the private number.


(17) *#43# Allows you to check the "Call Waiting" status of your phone.


(18) *#61# Allows you to check the number that "On No Reply" calls are diverted to.


(19) *#62# Allows you to check the number that "Divert If Unreachable (no service)" calls are diverted to.


(20) *#67# Allows you to check the number that "On Busy Calls" are diverted to.


(21) *#67705646# Removes operator logo on 3310 & 3330.


(22) *#73# Reset phone timers and game scores.


(23) *#746025625# Displays the SIM Clock status, if your phone supports this power saving feature "SIM Clock Stop


Allowed", it means you will get the best standby time possible.


(24) *#7760# Manufactures code.


(25) *#7780# Restore factory settings.


(26) *#8110# Software version for the nokia 8110.


(27) *#92702689# Displays - 1.Serial Number, 2.Date Made, 3.Purchase Date, 4.Date of last repair (0000 for no


repairs), 5.Transfer User Data. To exit this mode you need to switch your phone off then on again. ( Favourite )


(28) *#94870345123456789# Deactivate the PWM-Mem.


(29) **21*number# Turn on "All Calls" diverting to the phone number entered.


(30) **61*number# Turn on "No Reply" diverting to the phone number entered.


(31) **67*number# Turn on "On Busy" diverting to the phone number entered.


(32) 12345 This is the default security code.


press and hold # Lets you switch between lines


NOKIA5110/5120/5130/5190


IMEI number: * # 0 6 #

Software version: * # 0 0 0 0 #

Simlock info: * # 9 2 7 0 2 6 8 9 #

Enhanced Full Rate: * 3 3 7 0 # [ # 3 3 7 0 # off]

Half Rate: * 4 7 2 0 #

Provider lock status: #pw+1234567890+1

Network lock status #pw+1234567890+2

Provider lock status: #pw+1234567890+3

SimCard lock status: #pw+1234567890+4

NOKIA 6110/6120/6130/6150/6190

IMEI number: * # 0 6 #

Software version: * # 0 0 0 0 #

Simlock info: * # 9 2 7 0 2 6 8 9 #

Enhanced Full Rate: * 3 3 7 0 # [ # 3 3 7 0 # off]

Half Rate: * 4 7 2 0 #


NOKIA3110


IMEI number: * # 0 6 #

Software version: * # 0 0 0 0 # or * # 9 9 9 9 # or * # 3 1 1 0 #

Simlock info: * # 9 2 7 0 2 6 8 9 #

NOKIA 3330

*#06#

This will show your warranty details *#92702689#

*3370#

Basically increases the quality of calling sound, but decreases battery length.

#3370#

Deactivates the above

*#0000#

Shows your software version

*#746025625#This shows if your phone will allow sim clock stoppage

*4370#

Half Rate Codec activation. It will automatically restart

#4370#

Half Rate Codec deactivation. It will automatically restart

Restore Factory Settings

To do this simply use this code *#7780#

Manufacturer Info

Date of Manufacturing *#3283#

*3001#12345# (TDMA phones only)


This will put your phone into programming mode, and you'll be presented with the programming menu.

2) Select "NAM1"

3) Select "PSID/RSID"

4) Select "P/RSID 1"

Note: Any of the P/RSIDs will work

5) Select "System Type" and set it to Private

6) Select "PSID/RSID" and set it to 1

7) Select "Connected System ID"

Note: Enter your System ID for Cantel, which is 16401 or 16423. If you don't know yours,

ask your local dealer for it.

 Select "Alpha Tag"

9) Enter a new tag, then press OK

10) Select "Operator Code (SOC)" and set it to 2050

11) Select "Country Code" and set it to 302 for Canada, and 310 for the US.

12) Power down the phone and power it back on again

ISDN Code

To check the ISDN number on your Nokia use this code *#92772689#